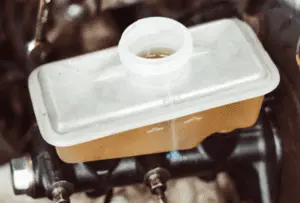
The process of bleeding brakes involves purging air from the brake system, and while this is a required step during some types of brake servicing and repair procedures, it is crucially important to get the purging process right to ensure proper brake operation. Read on to learn why you may need to bleed your brakes, and how to do it right the first time
Why you may need to bleed your brakes
It is important to understand that brake systems only work as intended when there is no air present anywhere in the network of brake lines. Unlike brake fluid, air is highly compressible, which means that pressurised brake fluid will first compress the air bubbles before it will act on the calipers and/or wheel cylinders. Moreover, since a normal braking event typically displaces less than one millilitre of brake fluid, large volumes of air in a brake system could prevent the generation of usable pressures in the brake system. From a safety perspective, this condition is the same thing as a sudden and catastrophic brake system failure.
As a practical matter, some brake service/repair procedures could introduce air into the brake system as a natural consequence of the repair procedure. These procedures include but are not limited to, caliper and wheel cylinder replacements, caliper seal or piston replacements, rubber or steel brake line replacements, master cylinder replacements, and any other repair procedure that requires that brake line joints and junctions be undone or disconnected.
In these cases, all air in the brake system must be purged to ensure the proper operation of the brakes after the repair, so below are some details of-
How to bleed brakes
While one person can bleed a brake system successfully, it should be noted that since bleeding a brake system can sometimes be a complicated affair, we highly recommend that you enlist an assistant to make things easier. Note also that you will need some basic tools and equipment, including the following
TIP: Apart from the tools and equipment listed below, you may want to consider investing in a vacuum or pressure based tool that eliminates the need for an assistant. These kinds of tools are available from most auto parts stores and come in a wide variety; from simple hand-held, manual vacuum pumps that suck brake fluid into a small container, to bulky equipment that requires a compressor to work. Note that while simple hand-held vacuum pumps are often adequate to bleed simple brake systems, bleeding complex brake systems on high-end vehicles usually requires the use of complex and expensive equipment that often includes a separate compressor if a compressor is not incorporated into the equipment- as is sometimes the case.
Based on the above, we recommend that you research the tools and equipment you need to bleed the brake system on your particular vehicle before you commit yourself to a procedure that could require equipment you may not own or have access to.
A sufficient quantity of clean brake fluid; we recommend about 500 ml of brake fluid that is recommended for the vehicle in a sealed container. Using brake fluid from sealed containers only will largely prevent the introduction of contaminants like water into the brake system
About a metre or so of silicone tubing; aquarium tubing works well
A 600 ml soft drink bottle cut down to about half its height
A suitable spanner, or selection of suitable spanners that will fit the bleeding nipples on the calipers and/or wheel cylinders
A few large highly absorbent cloth towels or rags to wipe off brake fluid spills, or a supply of sawdust to absorb brake fluid spills on the ground or garage floor
A set of four suitable and rated jack stands to place under the vehicle’s specified(!) support points
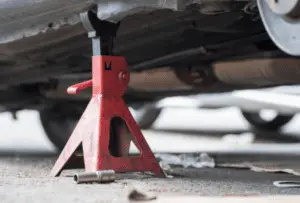
Car stand placed under a vehicle A suitable and rated jack that can lift the vehicle off the ground- one axle at a time
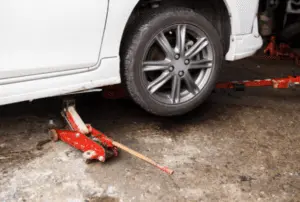
Car jack placed under a vehicle
WARNING: Since brake fluid is extremely corrosive, and its corrosive effect on painted surfaces is almost immediate, place a thick layer of newspaper or similar under the brake master cylinder reservoir to prevent brake fluid from coming into contact with the vehicle’s paint when refilling the reservoir during the bleeding process.
NOTE: While it is not always strictly necessary to remove the vehicle’s wheels, doing so makes it a whole lot easier to access bleeding nipples, especially on vehicles with drum brakes on the rear axle. If you are going to lift the vehicle off the ground, be sure to observe all safety precautions. Once you have the vehicle off the ground and supported safely, remove the wheels, clean the area around the brake master cylinder, and protect the vehicle’s paint by placing a thick layer of newspaper under the reservoir.
When you have all the required tools and equipment ready at hand, proceed as follows
STEP 1
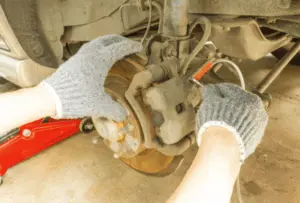
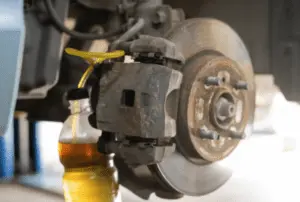
Start at the wheel that is furthest away from the master cylinder. Fit a suitable spanner onto the bleeding nipple, and slip one end of the silicone hose over the bleeding nipple’s end so that it fits securely. Place the other end of the hose into the cut-down soft drink bottle, and pour a small quantity of brake fluid into the container. Make sure the end of the silicone hose is fully submerged to prevent air from being sucked back into the brake system.
STEP 2
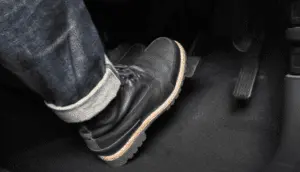
Have your assistant apply a firm pressure on the brake pedal, but make sure they maintain this pressure. Crack open the bleeding nipple, and observe what spurts out; in most cases, the brake fluid spurting out will be dirty, and there may not be any visible air bubbles in the old fluid. Close the bleeding nipple, and let your assistant remove pressure from the brake pedal.
STEP 3
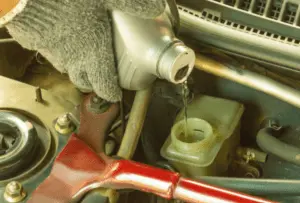
Repeat this process until the brake fluid that spurts out of the bleeding nipple is clear and free of visible air bubbles. Note that this process requires a fair bit of coordination between yourself and your assistant; they should not allow the brake pedal to rise before you have closed the bleeding nipple, so be sure to communicate clearly. Note also that it is important not to let the brake fluid reservoir on the master cylinder run dry- if this happens, you will simply be pumping air into the brake system, so have your assistant check and replenish the brake fluid level in the reservoir constantly.
NOTE: Have your assistant use extreme care not to spill brake fluid onto the vehicle’s paint while replenishing the brake fluid in the reservoir to prevent severe damage to the vehicle’s paint.
STEP 4
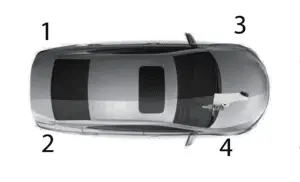
Once the brake fluid emerging from the first wheel is clear and free of air bubbles, repeat the process on the next furthest wheel from the master cylinder until the brake fluid on all four wheels is clear and free of air bubbles.
STEP 5
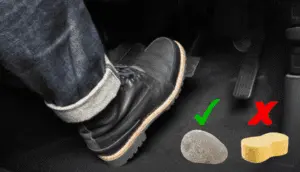
Check the operation of the brakes by starting the engine and stepping firmly on the brake pedal; if the system is free of air, the brake pedal will be rock-hard. There should be no “sponginess”, or abnormal pedal travel, and the pedal should not sink towards the floor under pressure.
Note, however, that damaged rubber brake hoses and master cylinder seals can cause the brake pedal to remain spongy or soft, so be sure to replace all suspect brake parts if bleeding the brakes does not resolve a spongy or soft brake pedal.
STEP 6
Top off the brake fluid level strictly to the “Maximum” mark on the reservoir, and clean up all brake fluid spills. Note that since brake fluid is water soluble, brake fluid spills on the hubs and calipers can easily be removed by spraying the hubs with a garden hose or pouring clean water over the hubs with a bucket or similar implement.
Next, fit the wheels, and lower the vehicle to the ground. Test the brakes by test-driving the vehicle in a safe environment to verify that the brakes work as expected.
